In our previous article on Hyperledger Besu, we highlighted the significance of Besu for developers. Today, we will walk through a step-by-step process of how to create a permissioned blockchain with Hyperledger Besu, completed with technical requisites, setup process, and more.
Note that these instructions are designed for developers who wish to set up a local environment to experiment with Hyperledger Besu. However, we will also discuss how they can easily configure a production-grade Hyperledger Besu permissioned network at the end of this article.
What makes Hyperledger Besu an ideal platform for permissioned blockchains?
Hyperledger Besu is like any other Ethereum execution client that manages and updates the blockchain state on the Ethereum network’s execution layer. However, Besu stands out for a variety of reasons, including the ability to support both permissioned and public blockchains, as well as its compatibility with popular test networks like Rinkeby, Ropsten, and Gorli.
The platform is optimized to implement three prominent consensus algorithms —- Proof-of-stake, Proof of Authority, and Proof of Work. Also, it offers world-class storage through RocksDB key-value database and implementing Enterprise Ethereum Alliance (EEA) specification to create a common interface across the diverse open-source and closed Ethereum’s projects.
Developers wanting to build decentralized enterprise solutions and private blockchains can use the Besu ecosystem to leverage its unique features and power their product with high scalability, customizability, and security attributes.
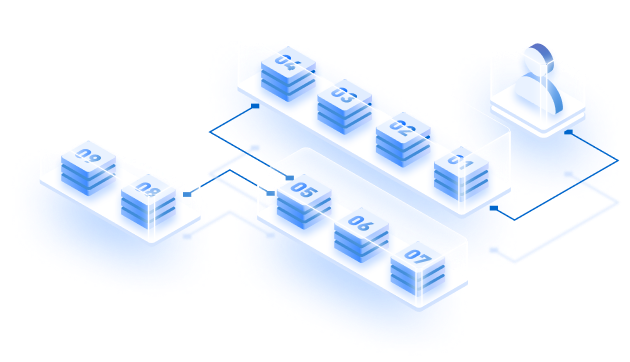
Get an high-level overview of Besu’s architecture for private blockchains explained in the given image:

One thing to note here is that: A permissioned network on Ethereum doesn’t mean we are free of all sorts of common Blockchain vulnerabilities. We still need to be cautious about security threats to protect our systems.
Read more on: Most Common Blockchain security Vulnerabilities and how to protect your nodes against them?
Tech stack for building a Besu Private network
Tech stack and system requirements to create a permissioned blockchain with Hyperledger Besu may vary on a range of factors, such as the size of the network, total transactions submitted on the blockchain, the gas limit for the block, and finally, the complexities of handling JSON-RPC, PubSub, or GraphQ queries by the node.
This guide explains the development of a permissioned blockchain with IBFT 2.0, PoA consensus on Besu with local node and account permissions. Following are the tech stack you require:
- Windows OS
- Binaries
- Docker.
- Java virtual machine with 4GB memory.
- VM with 6GB memory size and a virtual hard disk with a minimum 10GB space.
- Developer tools and IDEs
- Local SSD storage.
Interested in deploying Public networks with Besu?
Read: How to deploy an Ethereum node using Hyperledger Besu for Public Networks?
Creating a permissioned blockchain with Hyperledger Besu: 12 Steps to follow
Step1: Installing Besu
Install Besu using Developer Quickstart. Also, you need to install Docker image and Binaries to get more stable versions of Besu. Either way, you can install Hyperledger Besu from source code with the instructions given here.
Step2: Downloading Curl
Download Curl, which mostly offers the source package required in Besu network development.
Now, let’s create the blockchain. Our network infrastructure on Besu will basically include four nodes. You can add/reduce the nodes corresponding to the requirement.
Step3: Creating folders
Each node that upholds the Besu network will require a directory to record blockchain data. Thus, run the following command to create a data directory for all the four nodes; node 1, node 2, node 3, and node 4.
Permissioned-Network/
├── Node-1
│   ├── data
├── Node-2
│   ├── data
└── Node-3
│   ├── data
└── Node-4
    ├── data
Step4: Creating configuration files
Configuration files in the permissioned blockchain network define the IBFT 2.0 genesis file and the total node key pairs to generate. Note that this configuration file contains two nested JSON nodes, the genesis property that defines the IBFT 2.0 genesis file and the blockchain property that specifies the number of key pairs to generate.
Next, copy the given configuration file definition to another file called ibftConfigFile.json and save the same to the Permissioned-Network directory.
{
  "genesis": {
    "config": {
      "chainId": 1337,
      "berlinBlock": 0,
      "ibft2": {
        "blockperiodseconds": 2,
        "epochlength": 30000,
        "requesttimeoutseconds": 4
      }
    },
    "nonce": "0x0",
    "timestamp": "0x58ee40ba",
    "gasLimit": "0x47b760",
    "difficulty": "0x1",
    "mixHash": "0x63746963616c2062797a616e74696e65206661756c7420746f6c6572616e6365",
    "coinbase": "0x0000000000000000000000000000000000000000",
    "alloc": {
      "fe3b557e8fb62b89f4916b721be55ceb828dbd73": {
        "privateKey": "8f2a55949038a9610f50fb23b5883af3b4ecb3c3bb792cbcefbd1542c692be63",
        "comment": "private key and this comment are ignored.  In a real chain, the private key should NOT be stored",
        "balance": "0xad78ebc5ac6200000"
      },
      "627306090abaB3A6e1400e9345bC60c78a8BEf57": {
        "privateKey": "c87509a1c067bbde78beb793e6fa76530b6382a4c0241e5e4a9ec0a0f44dc0d3",
        "comment": "private key and this comment are ignored.  In a real chain, the private key should NOT be stored",
        "balance": "90000000000000000000000"
      },
      "f17f52151EbEF6C7334FAD080c5704D77216b732": {
        "privateKey": "ae6ae8e5ccbfb04590405997ee2d52d2b330726137b875053c36d94e974d162f",
        "comment": "private key and this comment are ignored.  In a real chain, the private key should NOT be stored",
        "balance": "90000000000000000000000"
      }
    }
  },
  "blockchain": {
    "nodes": {
      "generate": true,
      "count": 4
    }
  }
}
Security tip: The accounts in the above Genesis file are not meant to be on Mainnet or a public network, except to be used on the test networks. That’s so because it displays private keys, possibly creating account security concerns. This is not just the case with Hyperledger Besu, in fact every permissioned, enterprise blockchains should follow the same practices to avoid security-related issues.

Step5: Generating node keys and the genesis file
Use the Permissioned-Network directory to generate genesis file and the node key:
besu operator generate-blockchain-config --config-file=ibftConfigFile.json --to=networkFiles --private-key-file-name=keyThat’s where Besu creates the following directory for networkFiles:
genesis.json– The genesis file includes the extraData property that specifies all four nodes are validators.
A separate directory for each node under the name of node address and contains the public and private keys of each node:
networkFiles/
├── genesis.json
└── keys
    ├── 0x438821c42b812fecdcea7fe8235806a412712fc0
    │   ├── key
    │   └── key.pub
    ├── 0xca9c2dfa62f4589827c0dd7dcf48259aa29f22f5
    │   ├── key
    │   └── key.pub
    ├── 0xcd5629bd37155608a0c9b28c4fd19310d53b3184
    │   ├── key
    │   └── key.pub
    └── 0xe96825c5ab8d145b9eeca1aba7ea3695e034911a
        ├── key
        └── key.pub
Step6: Adding the genesis file to the Permissioned-Network directory
Copy and paste the genesis.json file to the Permisssioned-Network directory.
Step7: Adding the node private keys to node directories
Copy the key files of each node to their data directory:
Permissioned-Network/
├── genesis.json
├── Node-1
│   ├── data
│   │    ├── key
│   │    ├── key.pub
├── Node-2
│   ├── data
│   │    ├── key
│   │    ├── key.pub
├── Node-3
│   ├── data
│   │    ├── key
│   │    ├── key.pub
├── Node-4
│   ├── data
│   │    ├── key
│   │    ├── key.pub
Step8: Creating the permissions configuration file
You need permission configuration files to specify nodes in the network and their specific allowlist. To create the file, provide the following permission configurations to a file named permissions_config.toml. Store a copy in the Nodes’ directories– Node-1/data, Node-2/data, Node-3/data, and Node-4/data.
Permissions_config.toml
accounts-allowlist=["0xfe3b557e8fb62b89f4916b721be55ceb828dbd73", "0x627306090abaB3A6e1400e9345bC60c78a8BEf57"]
nodes-allowlist=[]
This permissions configuration file consists of the first two accounts out of the genesis file. Add permissioned nodes after starting the node using the perm_addNodesToAllowlist JSON-RPC API method.
Step9: Starting the nodes: Node-1, Node-2, Node-3, and Node-4
Start the Node-1
Run the following command:
besu --data-path=data --genesis-file=../genesis.json --permissions-nodes-config-file-enabled
--permissions-accounts-config-file-enabled
--rpc-http-enabled --rpc-http-api=ADMIN,ETH,NET,PERM,IBFT --host-allowlist="*"
--rpc-http-cors-origins="*"
Start Node-2
Setup the terminal, transit to the Node-2 directory, and then start the Node-2:
Run the following command:
besu --data-path=data --genesis-file=..\genesis.json --permissions-nodes-config-file-enabled
--permissions-accounts-config-file-enabled --rpc-http-enabled
--rpc-http-api=ADMIN,ETH,NET,PERM,IBFT --host-allowlist="*"
--rpc-http-cors-origins="*" --p2p-port=30304 --rpc-http-port=8546
Start Node-3
Setup a separate terminal and transit to the Node-3 directory before you start the node. Execute the following command:
besu --data-path=data --genesis-file=..\genesis.json --permissions-nodes-config-file-enabled
--permissions-accounts-config-file-enabled
--rpc-http-enabled --rpc-http-api=ADMIN,ETH,NET,PERM,IBFT --host-allowlist="*"
--rpc-http-cors-origins="*" --p2p-port=30305 --rpc-http-port=8547
Starting the Node-4
Start another terminal, transit to the Node-4 directory, and start the node:
besu --data-path=data --genesis-file=..\genesis.json
--permissions-nodes-config-file-enabled --permissions-accounts-config-file-enabled
--rpc-http-enabled --rpc-http-api=ADMIN,ETH,NET,PERM,IBFT --host-allowlist="*"
--rpc-http-cors-origins="*" --p2p-port=30306 --rpc-http-port=8548
Note: Every time you start the nodes, the command generates an enode URL that we’ll need to update permissions configurations in the next step.
Step10: Adding the enode URLs of the nodes to the permissions configuration files
Setup another terminal and add each node to the permission configuration file. Implement perm_addNodesToAllowlist JSON-RPC method for this.
Now, Replace <EnodeNode1>, <EnodeNode2>, <EnodeNode3>, and <EnodeNode4> with their respective enode URL mentioned below:
Node 1: curl -X POST –data
'{"jsonrpc":"2.0","method":"perm_addNodesToAllowlist","params":[["<EnodeNode1>","<EnodeNode2>","<EnodeNode3>","EnodeNode4"]], "id":1}' http://127.0.0.1:8545Node 2: curl -X POST –data
'{"jsonrpc":"2.0","method":"perm_addNodesToAllowlist","params":[["<EnodeNode1>","<EnodeNode2>","<EnodeNode3>","EnodeNode4"]], "id":1}' http://127.0.0.1:8546Node 3: curl -X POST –data
'{"jsonrpc":"2.0","method":"perm_addNodesToAllowlist","params":[["<EnodeNode1>","<EnodeNode2>","<EnodeNode3>","EnodeNode4"]], "id":1}' http://127.0.0.1:8547Node 4: curl -X POST –data
'{"jsonrpc":"2.0","method":"perm_addNodesToAllowlist","params":[["<EnodeNode1>","<EnodeNode2>","<EnodeNode3>","EnodeNode4"]], "id":1}' http://127.0.0.1:8548Step 11: Adding the nodes as peers
Add Node-1, Node-2, Node-3, and Node-4 as peers using the admin_addPeer JSON-RPC API method.
To do this, replace <EnodeNode1> with their enode URL that appears when starting the Node-1. For Node-2, 3 and 4, the enode URLs are added below:
Node-2
curl -X POST --data
'{"jsonrpc":"2.0","method":"admin_addPeer","params":["<EnodeNode1>"],"id":1}' http://127.0.0.1:8546
Node-3
curl -X POST --data
'{"jsonrpc":"2.0","method":"admin_addPeer","params":["<EnodeNode1>"],"id":1}' http://127.0.0.1:8547
Node-4
curl -X POST --data
'{"jsonrpc":"2.0","method":"admin_addPeer","params":["<EnodeNode1>"],"id":1}' http://127.0.0.1:8548
Replace <EnodeNode2> with the enode URL that appeared when starting Node-2.
Node-3
curl -X POST --data
'{"jsonrpc":"2.0","method":"admin_addPeer","params":["<EnodeNode2>"],"id":1}' http://127.0.0.1:8547
Node-4
curl -X POST --data
'{"jsonrpc":"2.0","method":"admin_addPeer","params":["<EnodeNode2>"],"id":1}' http://127.0.0.1:8548
Replace <EnodeNode3> with the enode URL that appeared when starting Node-3.
Node-4
curl -X POST --data
'{"jsonrpc":"2.0","method":"admin_addPeer","params":["<EnodeNode3>"],"id":1}' http://127.0.0.1:8548
Step12: Ensure the permissioned network is functioning as expected
Checking peer count
Use curl and call the JSON-RPC API net_peerCount method and confirm the smooth function of the nodes as peers:
curl -X POST --data '{"jsonrpc":"2.0","method":"net_peerCount","params":[],"id":1}' localhost:8545The output confirms Node-1 (which runs the JSON-RPC service) consists three peers (Node-2, Node-3, and Node-4)
{
  "jsonrpc" : "2.0",
  "id" : 1,
  "result" : "0x3"
}
Congrats! Your permissioned network is now live and running on the Besu ecosystem. You authenticate its functioning by doing transactions from accounts in the accounts allowlist and those outside the node allowlist. Further, you can start a new node anytime and stop the existing node as required.
A quick & low-code approach: Hyperledger Besu on Production
As mentioned, this guide explains how to create a permissioned blockchain with Hyperledger Besu represents the local web environment. However, the production network in Hyperledger Besu is different. What works well in the local setup may fail when it’s open to the world for real applications. The output must match the enterprise-grade requirements now, and the cost must be within control. Deployment of protocols is just one aspect; there are cloud management, DevOps, monitoring, and a few other vital infrastructure layers to be managed altogether apart from building your use case.
To simplify your development experience, Zeeve offers low-code deployment of Hyperledger Besu nodes and networks that takes only a few minutes to accomplish. Anyone can sign up for Zeeve and deploy their production-grade network without hassle. On top of that, Zeeve ensures the top-notch performance of the network with 24/7 node monitoring with proactive alerts and notifications.
Zeeve enables you to bypass so many layers of infrastructure management and accelerate your time to production. Start Your Hyperledger Besu journey today with Zeeve, and see how Zeeve can simplify your Besu deployment experience.
Talk to our blockchain experts to better understand how Zeeve can help you!