
There’s no polite way to say it: Avalanche L1s are on fire right now. Over 700 Avalanche L1s have already been launched on Fuji testnet, with 61 L1 mainnets currently active, supported by 639 validators and over 355,000 AVAX staked across all live L1 networks.
Zeeve itself has announced 15+ Avalanche L1 clients in just the last 90 days, with over a dozen in the pipeline. That speaks volumes about the speed, scale, and confidence the builder community has found with Avalanche sovereign L1 networks.
If you’ve been thinking about how to create Avalanche L1 chains—whether for a new protocol, a gaming ecosystem, an enterprise use case, or just to experiment at testnet scale—there has never been a better time. And the best part is, it doesn’t take days or weeks anymore. With platforms like Cogitus, you can go from zero to live Avalanche L1 chain in minutes.
This guide walks you through exactly how to create Avalanche L1 deployments step by step.

What Are Avalanche L1s and When Do You Need One?
Before we move into the technicalities of deploying an Avalanche L1, here is a recap for those who are not much familiar with L1s still.
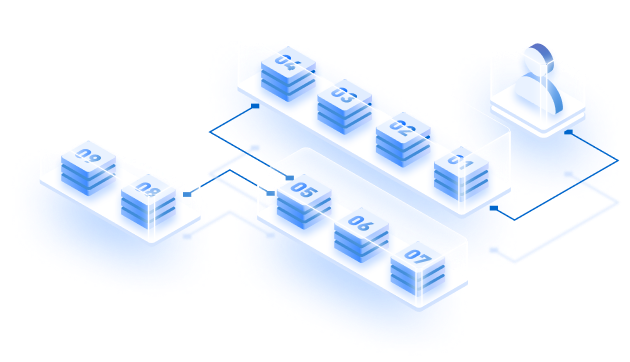
Avalanche L1s are fully sovereign blockchain networks built on Avalanche’s core infrastructure. They are independent validator ecosystems where the validator set works together to achieve consensus and maintain the network’s state. The powerful thing about Avalanche L1s is how flexible they are.
Permissionless L1s on @avax will change everything
— tehMoonwalkeR (@tehMoonwalkeR) April 5, 2025
🔺 Anyone will be able to launch a fully sovereign Layer 1 chain (a subnet) — no approvals, no gatekeepers.
🔺 Each L1 gets its own validator set, gas token, VM, and rules — like spinning up your own blockchain OS.
🔺… pic.twitter.com/dKgFV5yc2Z
You typically need to create Avalanche L1 when your project demands more than just deploying on an existing public chain, or maybe tied to a base layer like Ethereum.
If you need control over validators, compliance policies, network fees, tokenomics, or performance parameters, a dedicated L1 gives you the full flexibility to design exactly the environment your application requires. Broadly, we see three categories where builders create Avalanche L1 networks today:
- Permissioned chains for institutions, regulated assets, and government use cases
- Permissioned-public chains for enterprises, gaming, and high-performance payment ecosystems
- Permissionless public chains for crypto-native projects like DePIN, community platforms, ticketing, and other innovative ecosystems
If you want a deeper dive into L1 use cases, check out some of the detailed articles from the Zeeve blog below:
Why Some Of The Biggest Web3 Use Cases Are Choosing Avalanche L1s?
Now, let’s come back to what you came for: How to create Avalanche L1 in minutes using Cogitus by Zeeve. But for the people who want to do it manually, here’s how to go about it.
How to Create Avalanche L1: It All Depends On The Choice
1.Manual Setup: The Hard Way
Manual setup is usually the hard road ahead. Why? Imagine you are a dev/ project owner. Now, if you wish to create Avalanche L1s all on your own, you have to do the following things;
- Set up the Environment with dependencies in Golang, Git, Curl, JQ, and Unzip. Now, this is such a headache for anyone who has to start everything from scratch when moving to a new environment because you do not want to lose previous data, nor delay the process.
- Also, you need to set up Node Code Config, CLI, create genesis files, generate node keys, and so on and so forth. Now, all of these have to be so much of a mess because instead of focusing on improving your product/ experience, you are stuck with setting up the environment for your chain, as evident from the steps mentioned in the manual setup doc.
This works if you are deploying a fresh network. But if you want to migrate from an existing L2 or maybe another L1, you need an expert team who are well-versed with different deployment stacks and have done such things hundreds of times previously without any downtime or data loss.
But deployment is just the 1st step of your journey. To successfully create Avalanche L1 that can meet production requirements, You need continuous monitoring, close to 100% uptime, and a whole lot of integrations to make your chain fulfill your application needs.
That’s where a platform like Cogitus comes into play which handles all your manual jobs and free time for your team.
B. The Cogitus Way Powered By Zeeve
Yes, Cogitus, powered by Zeeve, can help you create Avalanche L1 in minutes. Here’s how you have to do the needful;
Step 1: Log in and Explore Your Dashboard
First, you need to Visit the Cogitus Platform and input your credentials. Once you have logged in, there are three environments available:
- A demo network pre-configured just for you to explore
- A testnet you can deploy yourself instantly
- A mainnet option where Zeeve works directly with you for production-grade deployment

The Demo network shows you exactly how a typical Avalanche L1 looks and behaves. It may not have every configuration enabled, but it gives you a valuable reference point. You can directly connect to the RPC node from this view, open the explorer, and even make a few test transactions using this demo dashboard to understand how the chain operates. It gives you full familiarity with the environment before you create Avalanche L1 your own chain.

Step 2: Deploying Your Avalanche L1 Testnet
Once ready, click the Deploy Testnet button to begin building your chain.
I) The first step is simple: give your network a name. In the example shown during deployment, the network was called “AvalancheDemoNetwork.” Set an EVM chain ID also, and check on Chainlist.org for uniqueness.

II) By default, Cogitus helps you create Avalanche L1 using Proof-of-Authority (PoA). If you want a Proof-of-Stake (PoS) network instead, you can request it by reaching out to the Zeeve team, who will enable it for you. But many of the users usually like to go with proof of authority itself.
III) Next, you choose the throughput configuration. You can select
- Low disk use/ Low throughput,
- Medium disk use/ medium throughput, or
- High disk use/ high throughput
In the test example, the medium configuration was used. But, based on the expected demand and usage for your chain, you can select what is suitable for you.
IV) Then you define your gas token symbol. You can set any custom name. In the walkthrough example, the token was called MYC, short for “my custom token.”
Cogitus allows you to assign initial token allocations by adding wallet addresses. So this is just a valid address to which my 10 tokens will be allocated. You can assign multiple addresses and distribute your initial supply any way you want. For example, in the 2nd address we added, we allocated 1000 tokens to that validator address.

Step 3: Configure Validator Set and Access Controls
Afterward, you have to do some pre-compiled configuration that allows you to define your validator set and administrative controls upfront, without writing a single line of backend code.
+\I) The first one is setting up who the owner of this validator set management is. So here you put your POA owner address. This address controls the validator set of the L1. You can transfer this ownership to another address at a later time.
Then I can also enable further pre-compiled addresses as well.

II) For example, the native minter allow list basically is a contract that manages what kind of tokens should be minted on your chain itself. You can put down something for the ‘admin addresses’ here. Similarly, you can also define your ‘manager addresses’, and your ‘Enabled Addresses’ also.
Admin Addresses can issue transactions and have full control over the allowlist, including the ability to add or remove Admins, Managers, and Enabled addresses vía contract calls to the precompile.
Manager Addresses can issue transactions, add or remove Enabled addresses via contract calls to the precompile, but cannot modify Admins or Managers.
Enabled addresses can issue transactions but cannot modify the allow list.
III) If you want to control contract deployment, you can define a Contract Deployer Allow List, which restricts who can deploy contracts onto your Avalanche L1. Similarly, you can configure a Transaction Allow List, which controls which addresses are allowed to make transactions on your network. For public networks, this can be disabled completely so that anyone can interact with the chain.
This helps many enterprise teams create Avalanche L1 with the perfect mix of permissioned or permissionless access.
The Fee Manager configuration allows you to set up full dynamic fee management and change fee settings at any time through on-chain governance. You can also set up the Reward Manager, which defines what kind of rewards shall be distributed, who should be distributed to, whether they should be distributed to a central wallet or different validators, etc. All these configs can be managed from here as well.

All these controls show why Avalanche L1s offer exceptional on-chain configurability. You do not have to rebuild or restart your chain to make changes to validators, deployers, minters, or fees.
Under all these categories of allowlists, there are options for admin addresses, manager addresses, and enabled addresses, as described above. Also, all these addresses can be controlled by an EOR or a smart contract as well. If not required, you can turn off some of these configurations as well.
Step 4: Preview and Deploy Your Network
Once every setting is finalized, Cogitus displays a full preview of what you are about to deploy. The preview shows chain IDs, blockchain IDs, VM IDs, EVM chain IDs, and all attached services like Tracehawk explorer and RPC nodes.
It also highlights that your network will include full monitoring dashboards, alerts, notifications, enterprise data SLAs, and 24/7 tech support already enabled.
You simply press Deploy Testnet, and you will be redirected to make the payment. Once done, your Avalanche L1 chain launches automatically within minutes.

Step 5: View and Monitor Your Testnet
I) Once done, it’s time to check the status of your L1. Now, you’ll find that your testnet section expands, where you can see your existing network, and all the statuses within this are marked now as completed.
If you want, you can also deploy a fresh testnet as well. And then you can, of course, post a mainnet too.

II) If I click on View Dashboard, it shows all relevant details: the network name, chain ID, blockchain ID, VM ID, EVM chain ID, and explorer URLs. The chain is fully operational, connected to Fuji Testnet for visibility on Avalanche’s global testnet explorer. You can see the RPC endpoint that you can use in your applications.

III) You can also access the Tracehawk explorer directly from the dashboard. This comes by default out of stock as it comes, but this can be made fully byte-labeled according to your requirements, your use case, and your branding theme. So, for example, you want to show the token prices for your network somewhere on top, it is very configurable once you create Avalanche L1.

IV) Cogitus also provides an integrated byte-labeled faucet service so you can easily distribute testnet tokens to your internal dev teams or partner projects without relying on any third-party faucet provider. So if you open it, it will give you a typical RPC endpoint that you can start using within your wallets and applications. This makes your testnet chain fully usable for dApp development and testing immediately.
In case you need a video guide for this whole deployment process, here’s our VP of Engineering, Sankalp Sharma, making a demo:

Admin Controls and Multi-Party Management
Avalanche supports a bunch of very mature management contracts, and our idea is that we want to encourage the usage of those contracts in the right fashion. And thats why Cogitus enables powerful admin control after you create Avalanche L1.
All your Avalanche nodes are continuously monitored by system-level and blockchain-level metrics.
These include CPU usage, network IO, memory consumption, network bandwidth, disk utilization, what is the amount of bandwidth that is left onto the machines itself, what kind of CPU load that you’re facing, but then also a lot of blockchain metrics like the number of peers that every node is connected to, what is the staking period, is it about end or not, what is the balance that you are left with into certain crucial wallets that may require the balances on, etcetera.
So, based on these, we are able to issue warnings to our support team and to you, who’s running these L1 networks for multiple use cases.
You will also have full administrative capabilities directly inside the dashboard to make ongoing changes to the network. You can allow or disallow certain validators to participate in your networks, as is the case with PoE networks.
You can drop or add certain validators based on requirements. It would also allow you to have multi-party-based network management, where you can expect that other parties can set up their nodes as well, being part of the same L1 network that you’ve just deployed with this dashboard here.
Cogitus already supports this capability through the Zeeve support team and plans to fully automate this feature for builders soon. Here’s how it looks:

All of these advanced controls are based on years of experience managing production Avalanche L1s and subnets for real clients. Many of these features were designed in collaboration with the Avalanche protocol team itself to ensure that everything is aligned with best practices.
Moving to mainnet With Full Power of Avalanche L1 & Custom Integrations of Cogitus by Zeeve
When you are satisfied with your testnet and want to go live, Cogitus also simplifies the journey to mainnet at just $995. All of your configuration data can be migrated to the mainnet without needing to manually reset anything. Zeeve handles the mainnet deployment, sets up your validator infrastructure, creates fully operational RPC nodes, and helps you launch your own branded block explorer under strict enterprise-grade SLAs.
In the end, you get a fully operational, customizable Avalanche L1 network running in production, ready for end users, dApps, and partners—all without having to deal with the legacy headaches of manual infrastructure management.
We also provide dozens of different apps and services integrations to expand your chain capabilities. You can see them here. If your required services are not available, you can request us and we can configure them for you.
Cogitus ensures when you create Avalanche L1, the path to scaling and production-readiness is already embedded into your workflow. The platform gives you every tool needed to go from idea to testnet to production mainnet within a single smooth workflow, with constant improvements and new capabilities added on a regular basis.
We have deployed over 15+ Avalanche L1s in the last 90 days. Let’s do your next. Talk to us!