
Ethereum is the ever-growing goliath among all blockchains, and with this growth arises the necessity for enterprise-ready Ethereum clients. Hyperledger Besu is one such popular enterprise-ready Ethereum client capable of implementing private and public permissive networks.
This guide will explain how to run an Ethereum node using Hyperledger Besu, starting with its definition.
What is Hyperledger Besu?
Hyperledger Besu is an Ethereum client that is open-source. It serves as an execution client on public PoS Ethereum networks like Sepolia, Goerli, and Ethereum Mainnet.
Besu supports standard smart contract and decentralized app development, operational, and deployment use cases and does not support key management inside the client. With Besu, make use of EthSigner to access your “key” and to sign your transactions.
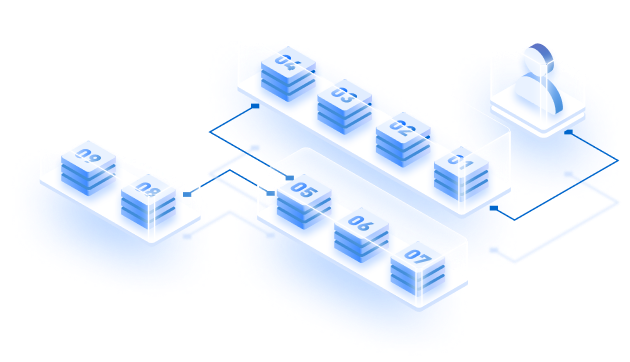
The Hyperledger Besu Architecture
Take a look at the following diagram that depicts the high-level architecture of Hyperledger Besu.

System Requirements and Prerequisites
To install and run Hyperledger Besu smoothly, you need to have the following systems configuration.
- RAM: 8GB
- Storage: 750GB (Fast synchronization with pruning enabled) and 3TB (Full synchronization)
- Disk Type: SSD. Use NVMe SSDs for better IOPS and throughput.
Click this official Hyperledger Besu website link for more information on system requirements.
The deployment requires Java JDK 11+ to be installed. Download the latest version for Java here.
Installing Hyperledger Besu
There are multiple methods for installing Hyperledger Besu. Using the binary or Docker image for stable versions is recommended, but let us use the binary version for this step.
Install from packaged binaries.
Click this link to download the latest binary version. Upon downloading, unpack the downloaded files and change them into the besu-<release> directory.
To confirm installation:
cd besu-22.10.3 # Here we downloaded the Besu release - 22.10.3
bin/besu --help
Run Besu on Ethereum Testnet
After installation, the first step is running Besu as an execution client with consensus on the Sepolia and Goerli testnet and then to;
Generate the shared secret.
Run this command to generate the secret.
openssl rand -hex 32 | tr -d "\n" > jwtsecret.hexSpecify jwtsecret.hex while starting the consensus client and Besu. The clients utilize this JWT secret to authenticate one another when busting the Engine API.
Start Besu
For Goerli, specify the options or run the below command
bin/besu \
  --network=goerli                     \
  --rpc-http-enabled=true              \
  --rpc-http-host=0.0.0.0              \
  --rpc-http-cors-origins="*"          \
  --rpc-ws-enabled=true                \
  --rpc-ws-host=0.0.0.0                \
  --host-allowlist="*"                 \
  --engine-host-allowlist="*"          \
  --data-storage-format=BONSAI         \
  --sync-mode=X_SNAP                   \
  --engine-rpc-enabled                 \
  --engine-jwt-secret=<path to jwtsecret.hex>
Specify –engine-jwt-secret path to the jwtsecret.hex file generated.
In this case, the path is –
--engine-jwt-secret=jwtsecret.hexFor the Sepolia network, use the command
--network=sepolia.Now, modify the option values and add other command line options as needed.
Generate validator keys and stake ETH
Make a test Ethereum address if you’re deploying a validator client. Here’s how to do this on MetaMask. Upon creating the address, fund it with testnet ETH using a faucet, and you will need a sample of 32 ETH and gas fees.
Next, look at the list of Goerli and Sepolia faucets for the funding of wallets, generate validator keys, and stake your testnet ETH for one or more validators using the Goerli Staking Launchpad.
Note: Skip to the next step if you’re running a beacon node.
Important: Save the password used to generate each key pair in a .txt file. You should also have a .json file for each validator key pair. Ensure your Besu node is completely synced.
Start consensus client.
If you’re using Teku as your consensus client, follow this tutorial or if you’re going to use a different consensus client, refer to their documentation, and skip this part.
Beacon Node
To run Teku as a beacon node only (without validator duties), run the following command on a new terminal window or specify the options in the Teku configuration file.
teku \
  --network=goerli                             \
  --ee-endpoint=http://localhost:8551          \
  --ee-jwt-secret-file=<path to jwtsecret.hex> \
  --metrics-enabled=true                       \
  --rest-api-enabled=true
The path to jwtsecret.hex is the same as we provided while starting Besu.
For the Sepolia network, you can run the command
--network=sepoliaBeacon node and validator client.
Next, to run Teku as a beacon node and validator, run the following command –
  --network=goerli                                          \
  --ee-endpoint=http://localhost:8551                       \
  --ee-jwt-secret-file=<path to jwtsecret.hex>              \
  --metrics-enabled=true                                    \
  --rest-api-enabled=true                                   \
  --validators-proposer-default-fee-recipient=<ETH address> \
  --validator-keys=<path to key file>:<path to password file>[,<path to key file>:<path to password file>,...]
Again, the path to jwtsecret.hex is the same as provided while starting Besu.
Use the Ethereum address created using Metamask and set it as the default fee recipient using the –validators-proposer-default-fee-recipient option.
The paths to the Keystore .json file and password .txt file were created in step 4 for each validator using the –validator-keys option. Separate the .json and .txt files with a colon and separate entries for multiple validators with commas.
You’re all set.
After starting Besu and Teku; your node starts syncing and connecting to peers.
Logs similar to this will be seen in Besu
2022-12-19 18:56:09.295-07:00 | EthScheduler-Timer-0 | INFO  |
FullSyncTargetManager | No sync target, waiting for peers. Current peers: 0
2022-12-19 18:56:14.298-07:00 | EthScheduler-Timer-0 | INFO  |
FullSyncTargetManager | No sync target, waiting for peers. Current peers: 0
2022-12-19 18:56:14.848-07:00 | nioEventLoopGroup-3-8 | INFO  |
FullSyncTargetManager | No sync target, waiting for peers. Current peers: 3
2022-12-19 18:56:18.452-07:00 | nioEventLoopGroup-3-8 | INFO  |
SyncTargetManager | Found common ancestor with peer Peer
0xab3a286b181721c794... at block 55127
2022-12-19 18:56:18.454-07:00 | nioEventLoopGroup-3-8 | INFO  |
PipelineChainDownloader | PipelineChain download complete
Logs similar to this will be seen in Teku
2022-12-19 18:57:24.355 INFO  - Syncing     *** Target slot: 76092, Head
slot: 2680, Remaining slots: 73412, Connected peers: 8
2022-12-19 18:57:36.363 INFO  - Syncing     *** Target slot: 76093, Head
slot: 2879, Remaining slots: 73214, Connected peers: 10
2022-12-19 18:57:48.327 INFO  - Syncing     *** Target slot: 76094, Head
slot: 3080, Remaining slots: 73014, Connected peers: 8
2022-12-19 18:58:00.339 INFO  - Syncing     *** Target slot: 76095, Head
slot: 3317, Remaining slots: 72778, Connected peers: 6
2022-12-19 18:58:12.353 INFO  - Syncing     *** Target slot: 76096, Head
slot: 3519, Remaining slots: 72577, Connected peers: 9
If you’re a validator, you can check your validator status by searching your Ethereum address on the Goerli Beacon Chain explorer. It may sometimes take multiple days for your validator to be activated and start proposing blocks.
Run Besu on Mainnet
Running Besu on Mainnet follows the same steps in the same order as for Testnet.
Here we only need to make some changes in the configuration file for network selection. Use the following command to start Besu
besu \
  --sync-mode=X_SNAP           \
  --data-storage-format=BONSAI \
  --rpc-http-enabled=true      \
  --rpc-http-host="0.0.0.0"    \
  --rpc-ws-enabled=true        \
  --rpc-ws-host="0.0.0.0"      \
  --host-allowlist=<IP of Besu node>,127.0.0.1,localhost        \
  --engine-host-allowlist=<IP of Besu node>,127.0.0.1,localhost \
  --engine-rpc-enabled         \
  --engine-jwt-secret=<path to jwtsecret.hex>
Specify the IP address of your Besu node in the –host-allowlist and –engine-host-allowlist options.
If you set Besu as a validator client, generate validator keys and stake your ETH for one or more validators using the Staking Launchpad.
Use the following command to start Teku as a beacon node only
teku \
  --ee-endpoint=http://localhost:8551          \
  --ee-jwt-secret-file=<path to jwtsecret.hex> \
  --metrics-enabled=true                       \
  --rest-api-enabled=true
To start Teku as a beacon and validator node
teku \
  --ee-endpoint=http://localhost:8551                       \
  --ee-jwt-secret-file=<path to jwtsecret.hex>              \
  --metrics-enabled=true                                    \
  --rest-api-enabled=true                                   \
  --validators-proposer-default-fee-recipient=<ETH address> \
  --validator-keys=<path to key file>:<path to password file>[,<path to key file>:<path to password file>,...]
If you are a validator, you can check your validator status by searching your Ethereum address on the Beacon Chain explorer. It may take multiple days for your validator to be activated and start proposing blocks.
There you have it. These are the steps to run an Ethereum node using Hyperledger Besu successfully. The steps show the deployment of both – validator and beacon nodes, so follow the steps carefully, and you may use your own wallet or a faucet of your choice if you’re not interested in Metamask.
Wrapping Up
It is remarkable to realize that Hyperledger Besu is still in its infancy and is capable of deploying Ethereum clients on both public and permissive networks. That said, use Zeeve to deploy your Ethereum node using Hyperledger Besu.
Zeeve is a leading Blockchain infrastructure platform that not only supports Ethereum but other public protocols like Polygon, Binance, and Polkadot, and permissive protocols like R3Corda and Hyperledger Fabric as well.
Book a free developer consultation today, and make the most of Zeeve’s products & services.