


Avalanche L1s (Formerly known as Subnets) are a way to increase the efficiency and scalability of Avalanche transactions. By partitioning Avalanche nodes into smaller groups, called L1s, Avalanche can process more transactions simultaneously and faster.
There are many advantages of running your own L1 (Formerly known as Subnets). L1s offer higher throughput, strict access control, and EVM customization.
Here in this article, we will explore how to create an Avalanche L1 (Formerly known as Subnets) on the Fuji test network. The entire process can be described by breaking it down into three parts:
- Running Local Avalanche Node
- Make it a validator
- Creating L1
So without further ado, let’s jump into the command line…
Running A Local Avalanche Node:
- The first step is to set up GO– the default language for the official implementation of Avalanche. To verify if it’s already installed, run this command by opening the Command prompt. This should print the installed version of GO.
$ go version- We also need to install Git- a handy DevOps tool used for source code management. Git comes installed default on MAC or Linux. Activate it by running the following command in the command prompt:
git version - Now we will move to the node implementation stage. Here, we are taking the native installation option. Hence, we need to clone the AvalancheGO repository by running:
git clone git@github.com:ava-labs/avalanchego.git
If the download is complete, run the below command to check out to master branch and move to the avalanche go folder
cd avalanchegoThen run this Build script
./scripts/build.sh
The output of the script will be the avalanche binary named avalanchego located in the build directory
./build/avalanchegoIf you want to take some other installation approach like a Docker file, pre-build binary, or an APT repository, check out AvalancheGo GitHub. But downloading the source code is recommended if you are a developer looking to build on Avalanche.
- Next, we need to run the node and connect it to the Fuji testnet. Execute:
./build/avalanchego --network-id=fuji
It’s time for bootstrapping now. It can take several hours or even days depending on the hardware. Usually, the database I/O is the problem during the bootstrapping process. Bootstrapping time can be reduced by using a more advanced CPU or increasing the database IOPS on the machine hosting the node.
To check if it’s done bootstrapping call info.isBootstrapped in a new tab. To send a cURL request copy and paste the following command:
curl -X POST --data '{
    "jsonrpc":"2.0",
    "id"     :1,
    "method" :"info.isBootstrapped",
    "params": {
        "chain":"X"
    }
}' -H 'content-type:application/json;' 127.0.0.1:9650/ext/info
It will return TRUE if done:
{
  "jsonrpc": "2.0",
  "result": {
    "isBootstrapped": true
  },
  "id": 1
}
We now have a node on Avalanche primary network. You can access C, P, and X chains using this node endpoint. But it’s not a validator yet. The next step is to make it a validator node in the Fuji testnet.
Adding A Validator With Avalanche Wallet:
- The first step is to retrieve the node id. Call info.getNodeID and copy-paste the following:
curl -X POST --data '{
    "jsonrpc":"2.0",
    "id"     :1,
    "method" :"info.getNodeID"
}' -H 'content-type:application/json' 127.0.0.1:9650/ext/info
The response will contain your node id like this:
{
  "jsonrpc": "2.0",
  "result": {
    "nodeID": "NodeID-5mb46qkSBj81k9g9e4VFjGGSbaaSLFRzD"
  },
  "id": 1
}
- Next, go to the Avalanche Wallet page. Create a new wallet, and select the Fuji testnet option. Now to become a Validator you at least need 1 AVAX in the P-chain.
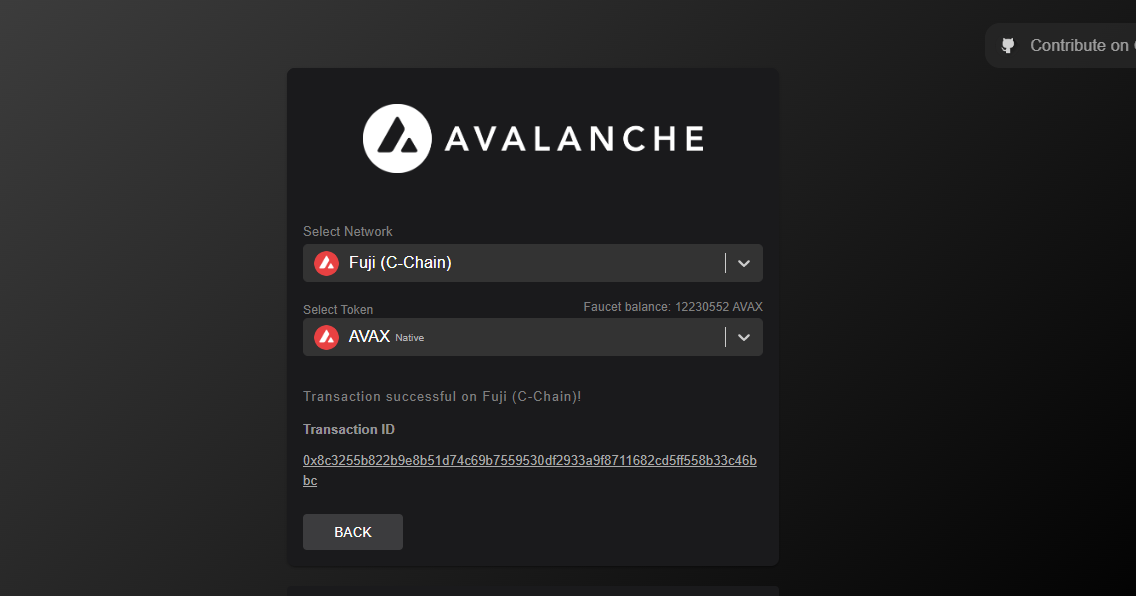
Copy your C-chain address to get 2 test AVAX from the faucet. Then transfer it to the p-chain.
Then, Go to the EARN section and click on Add Validator. You will be asked for your Node Id. Fill out all other staking parameters. If you click on ‘Confirm’ a success message will be displayed.

Congratulations, we have added our node as a validator in the Fuji testnet. That’s it.
- To verify, if your node is added to the Fuji testnet, call platform.getCurrentValidators
platform.getCurrentValidators({
    subnetID: string, // optional
    nodeIDs: string[], // optional
}) -> {
    validators: []{
        txID: string,
        startTime: string,
        endTime: string,
        stakeAmount: string,
        nodeID: string,
        weight: string,
        rewardOwner: {
            locktime: string,
            threshold: string,
            addresses: string[]
        },
        potentialReward: string,
        delegationFee: string,
        uptime: string,
        connected: bool,
        delegators: []{
            txID: string,
            startTime: string,
            endTime: string,
            stakeAmount: string,
            nodeID: string,
            rewardOwner: {
                locktime: string,
                threshold: string,
                addresses: string[]
            },
            potentialReward: string,
        }
    }
}
If your node id is there, move on to the next part: L1 Creation.
Creating L1:
- To use in the testnet node only, we will create a user with the Key store API. Things to note here is key store exists at the node level, and the node operator has access to your username and password. So create a key store user only on a node that you operate. Plus, don’t use it in the mainnet.
- To create a new user, Call:
curl -X POST --data '{
    "jsonrpc":"2.0",
    "id"     :1,
    "method" :"keystore.createUser",
    "params" :{
        "username":"myUsername",
        "password":"myPassword"
    }
}' -H 'content-type:application/json;' 127.0.0.1:9650/ext/keystore
If successful, you will get a response like this:
{
  "jsonrpc": "2.0",
  "id": 1,
  "result": {}
}
- To create a new address on P-chain controlled by the new user, call
curl -X POST --data '{
    "jsonrpc": "2.0",
    "method": "platform.createAddress",
    "params": {
        "username":"myUsername",
        "password":"myPassword"
    },
    "id": 1
}' -H 'content-type:application/json;' 127.0.0.1:9650/ext/bc/P
Here is the example response:
{
  "jsonrpc": "2.0",
  "result": {
    "address": "P-avax18jma8ppw3nhx5r4ap8clazz0dps7rv5ukulre5"
  },
  "id": 1
}
- Now we have to create a new L1 (Formerly known as Subnets). Here we will need the address generated in the last step. But before we run platform.createSubnet, we need to top up the address with P-chain AVAX. We need to import the current wallet using its private key. Run:
curl -X POST --data '{
    "jsonrpc":"2.0",
    "id"     :1,
    "method" :"platform.exportKey",
    "params" :{
        "username" :"myUsername",
        "password": "myPassword",
        "address": "P-avax18jma8ppw3nhx5r4ap8clazz0dps7rv5ukulre5"
    }
}' -H 'content-type:application/json;' 127.0.0.1:9650/ext/bc/P
The response will show you the private key for the generated address:
{
  "jsonrpc": "2.0",
  "id": 1,
  "result": {
    "privateKey": "PrivateKey-Lf49kAJw3CbaL783vmbeAJvhscJqC7vi5yBYLxw2XfbzNS5RS"
  }
}
- Import wallet for the generated private key. Then follow the same steps you did in the first part to get test AVAX for C-chain and do a cross-chain transfer to get it on the P-chain. We are almost done. Now run:
curl -X POST --data '{
    "jsonrpc": "2.0",
    "method": "platform.createSubnet",
    "params": {
        "controlKeys":[
            "P-avax18jma8ppw3nhx5r4ap8clazz0dps7rv5ukulre5",
            "P-avax18jma8ppw3nhx5r4ap8clazz0dps7rv5ukulre5"
        ],
        "threshold":2,
        "from": ["P-avax18jma8ppw3nhx5r4ap8clazz0dps7rv5ukulre5"],
        "changeAddr": "P-avax103y30cxeulkjfe3kwfnpt432ylmnxux8r73r8u",
        "username":"myUsername",
        "password":"myPassword"
    },
    "id": 1
}' -H 'content-type:application/json;' 127.0.0.1:9650/ext/bc/P
If everything goes well, you should get the following response:
{
  "jsonrpc": "2.0",
  "result": {
    "txID": "hJfC5xGhtjhCGBh1JWn3vZ51KJP696TZrsbadPHNbQG2Ve5yd"
  },
  "id": 1
}
The transaction Id in the above response is our L1 Id. We have successfully created our L1 (Formerly known as Subnets).
Want to avoid these long and complex processes? We can help.
Boost your L1 at one click with Zeeve
The Avalanche L1 can be tricky to create and maintain, requiring developers to remember a range of do’s and don’ts, the latest upgrades, best practices, etc. Security is also a constant concern. That’s where Zeeve comes in.
At Zeeve, we offer Avalanche L1 (Formerly known as Subnets) as a service, providing expert support in the backend so you can focus on continuing to grow your business. Let us handle the technicalities while you enjoy the benefits of a fully functional Avalanche L1. Give Zeeve a try today and see how we can simplify your Avalanche L1 experience.
Launch your own Avalanche L1with Zeeve without maintaining the DevOps of a node.
