Deploying a staking node can be tricky. There are various platforms that enable you to deploy staking nodes, but few offer tools and easy steps to get your node up & running and support major blockchain protocols simultaneously.
In this instance, Zeeve is the platform that helps you deploy your staking node, and Avalanche is the protocol that allows you to stake.
Avalanche is a smart contract platform with the most validators securing its activity in the entire PoS (Proof of Stake) consensus mechanism.
By deploying your Avalanche staking node on Zeeve, you are all set to earn interest, generate passive income, and support your favorite crypto projects as well.
So without further ado, here are the steps to deploy your first staking node.
Step 1: SignUp to Zeeve
The first step is signing up to Zeeve by visiting the website app.zeeve.io/auth and verifying the reCAPTCHA, followed by selecting Staking Nodes under Buy Services and then selecting Avalanche under Public Protocols, as shown in the image below.
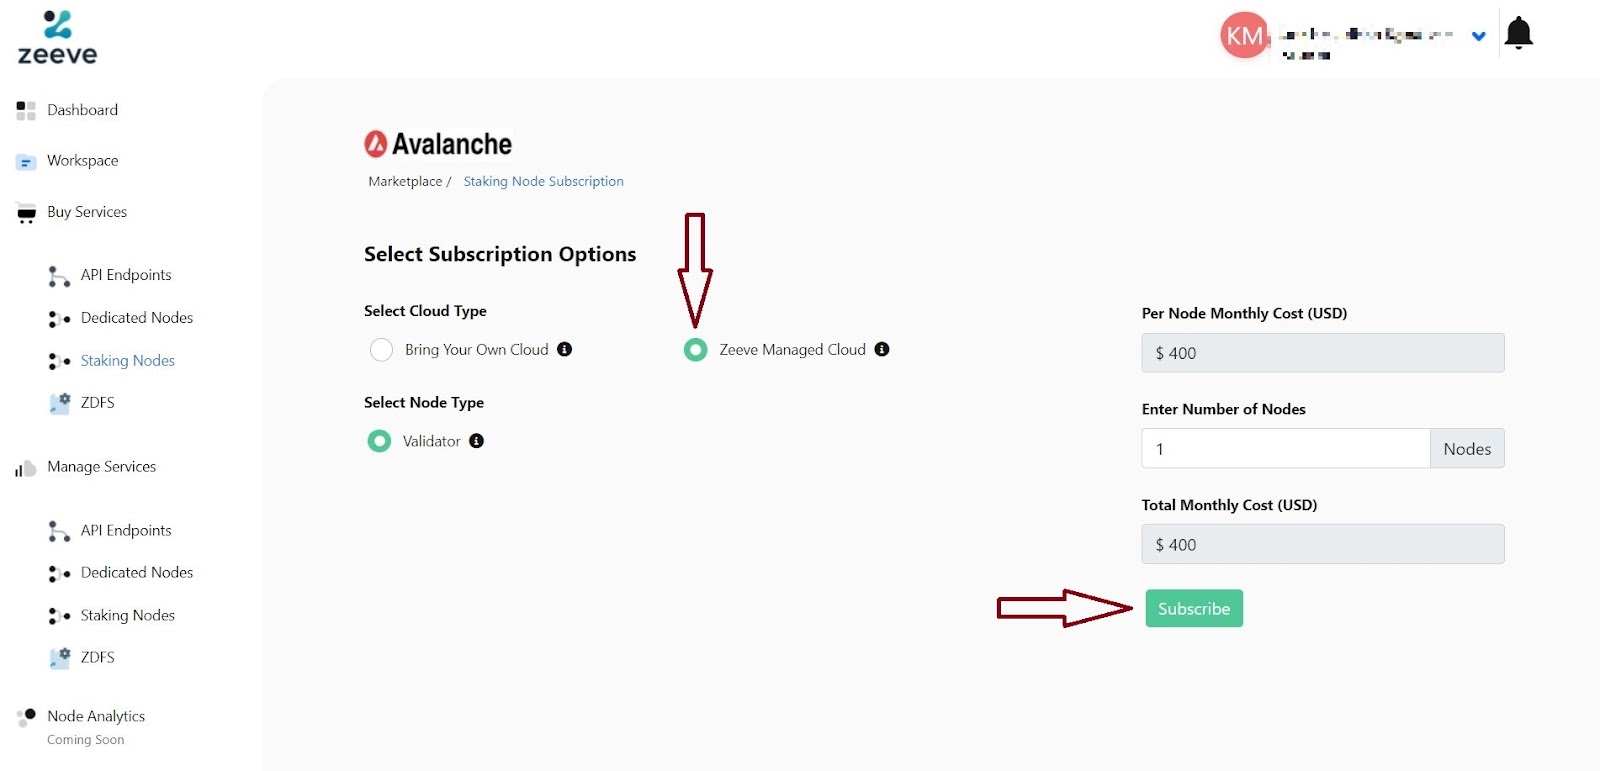
Step 2: Selecting a Cloud Subscription
The next step is to either select Bring Your Own Cloud (BYOC) or Zeeve Managed Cloud if you don’t have your own cloud.
By the time this article is being written, Zeeve provides AWS and Digitial Ocean options, but more options are in the pipeline to be added in the coming days.
To keep it simpler, let’s select Zeeve Managed Cloud and click Subscribe.
Step 3: Payment
The subscription charges may seem high on the surface but this is far from the truth. When you hire a node service provider, you are hiring a team of developers and professionals who strive to keep your node up & running, day & night, without allowing for any downtime.
Node services like Zeeve also have strategically placed nodes across the globe to ensure swift transactions, and eliminate delays.
Considering the myriad of benefits you can enjoy, hiring a node service provider, instead of deploying your own node is a no-brainer.
Upon completion of the payment process, you will see the screen below, where you can click Setup Network/Node.

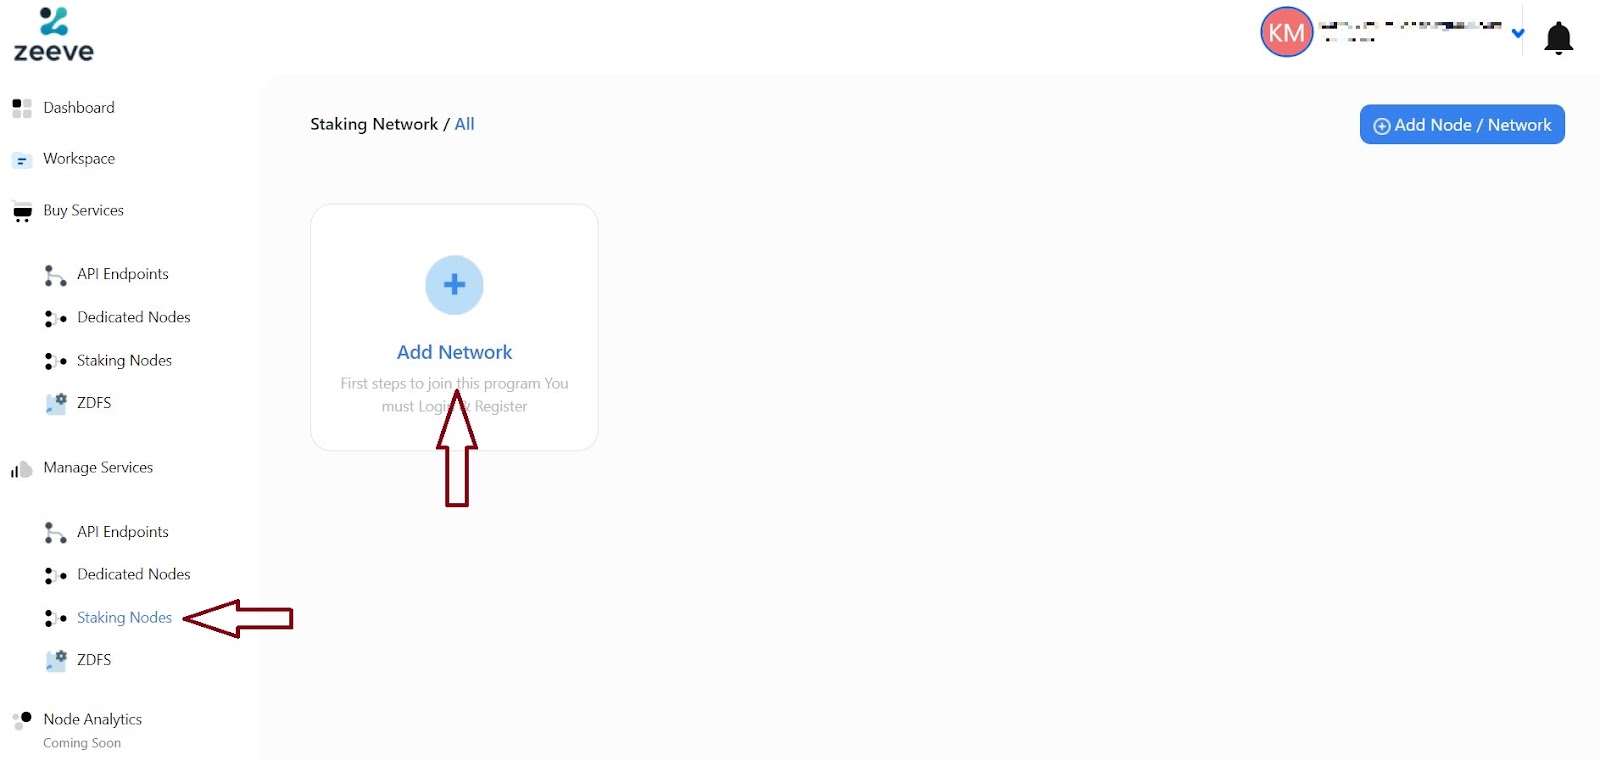
Step 4: Adding Network
Here, click on Staking Nodes under Manage Services, and then click Add Network.
You will now be directed to the Add Network step where you can select Avalanche again, and here, you can also see your selected cloud service and what you’re building – Zeeve Managed Cloud and Validator Node.

Step 5: Selecting your Network
Upon clicking Avalanche, you will be directed to a webpage where you can select your Network.
Begin by naming your network, then select Testnet under Select Type of Network, followed by Native Avalanche Deployment under Select Deployment Type, and at last, Default Workspace under Select Workspace.
As you start using other services like Dedicated Nodes, generating API Endpoints, etc, you may create new Workspaces other than the Default Workspace.
After making these selections, click Next Step.

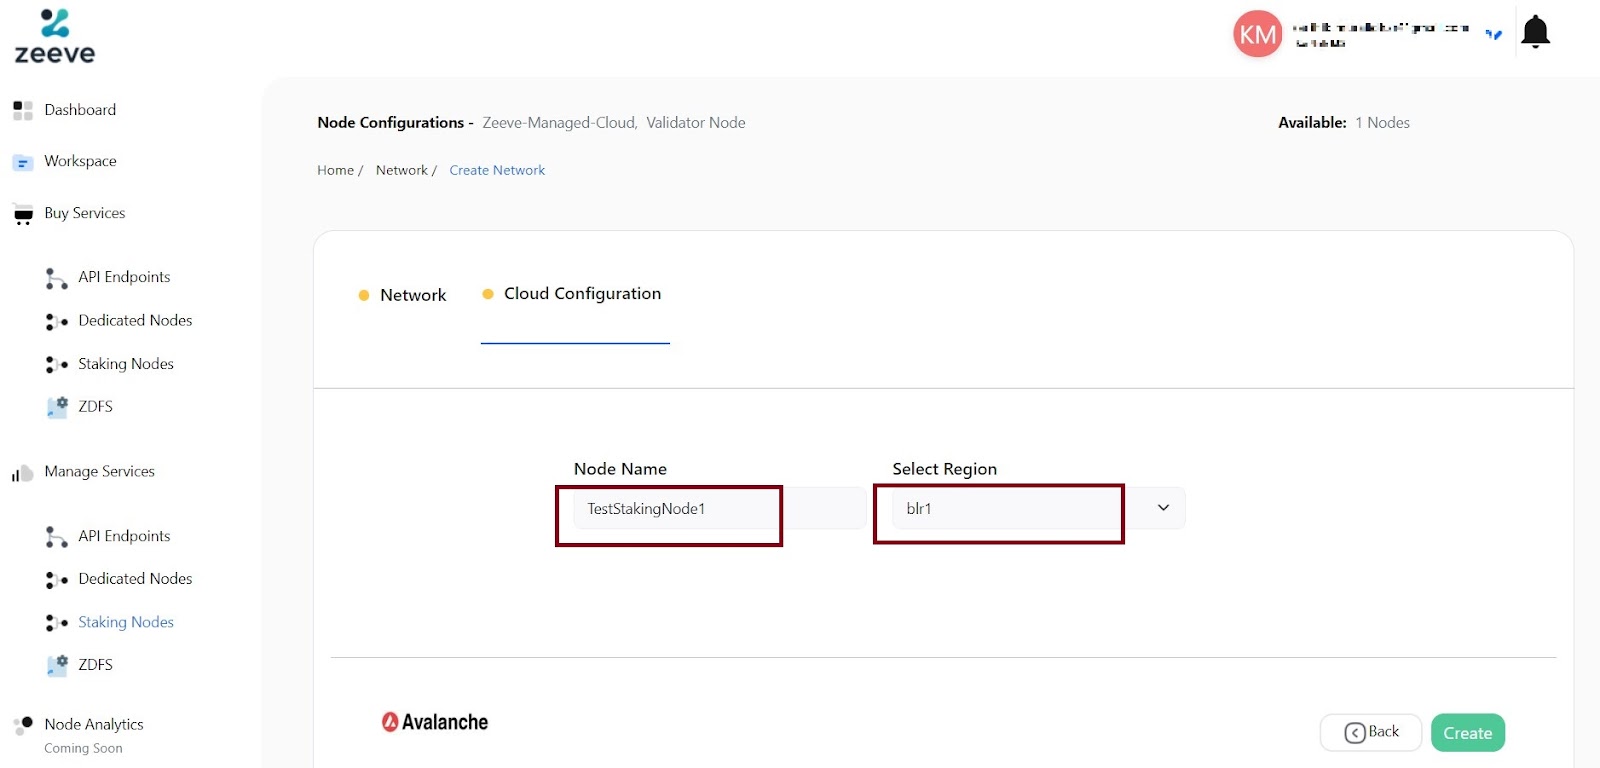
Step 6: Configuring your Cloud
The next step is where you configure your cloud by naming your node and selecting the region of your node.
In this instance, I am naming the node TestStakingNode1 and selecting blr1 as my region.
Feel free to name the node as you please and select the region most suited for you and click Create.
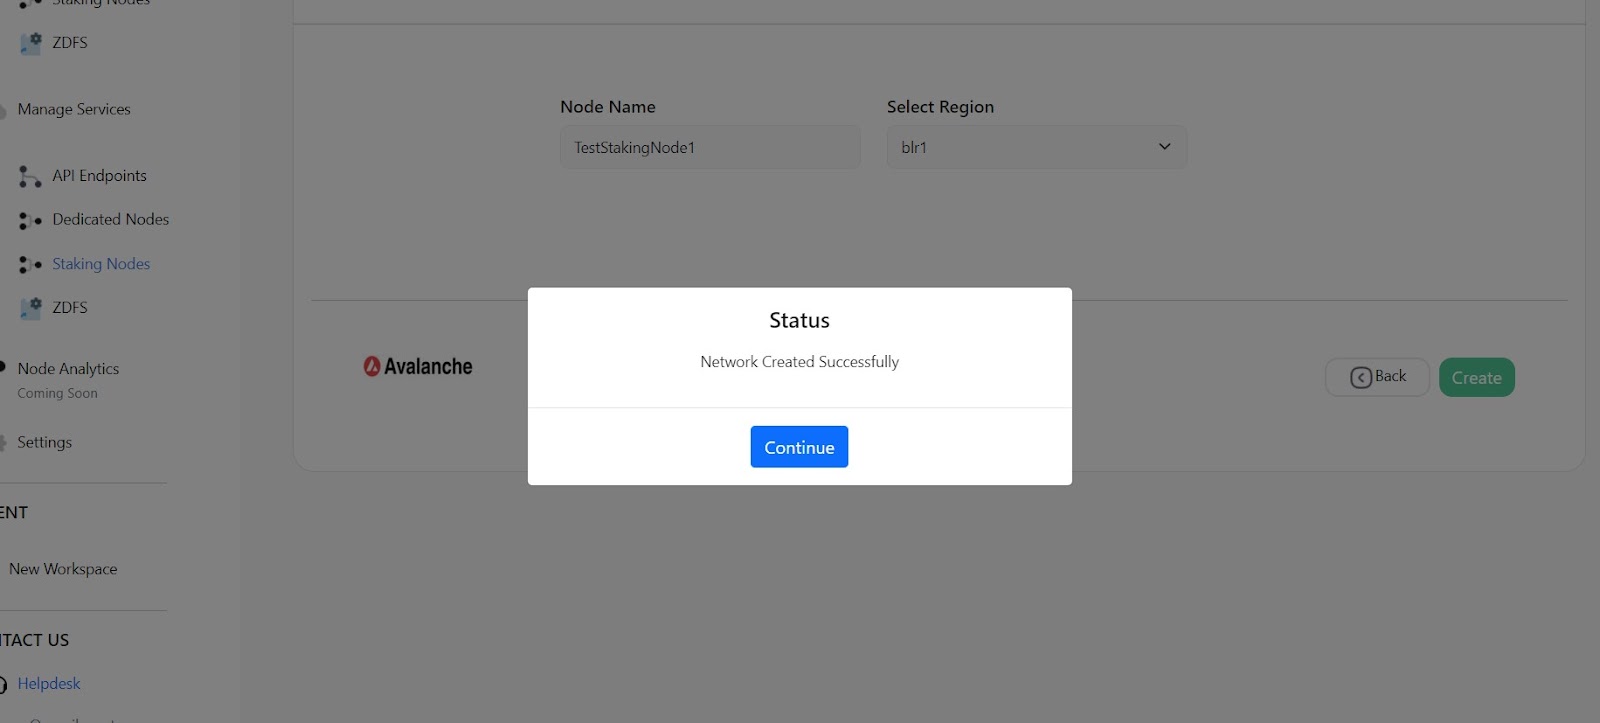
Upon clicking create, you will see a prompt that says Status – Network Created Successfully.
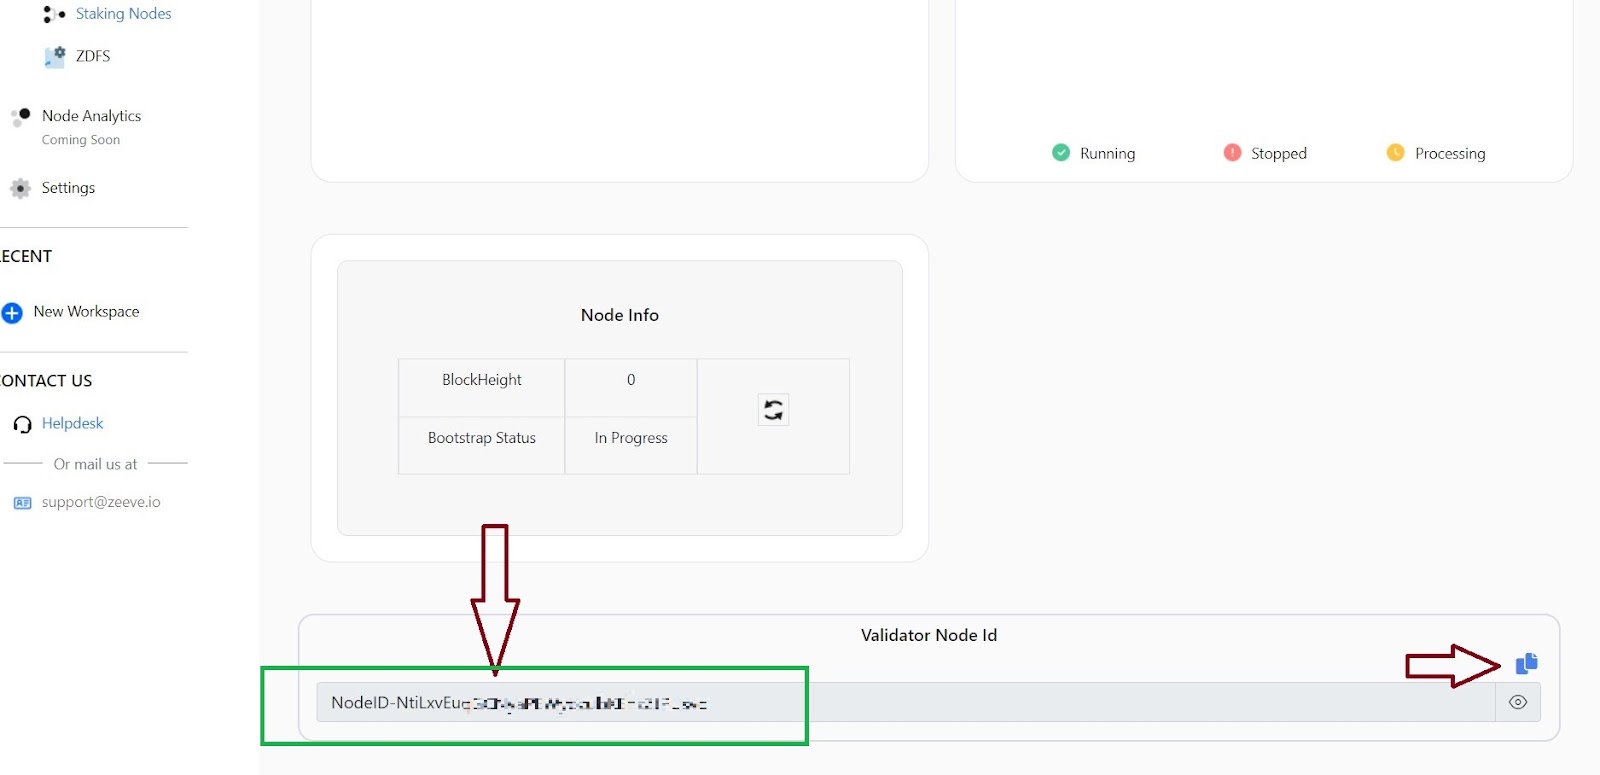
Step 7: Viewing your Endpoint
You can now continue and visit Staking Nodes under Manage Services.
Here, you will initially either see the node processing (yellow), or red (stopped). But in a few minutes, it will turn green which means your node is up and Running.
You can now click View Endpoint which scrolls the screen down to reveal the result.

Step 8: The Result
Voila, you have created your first Validator Node depicted by Node ID.
If all you wanted was to learn how to deploy an Avalanche Staking node, the process is this. If you want to briefly learn how to Validate it on the Avalanche Wallet and start earning, keep reading.
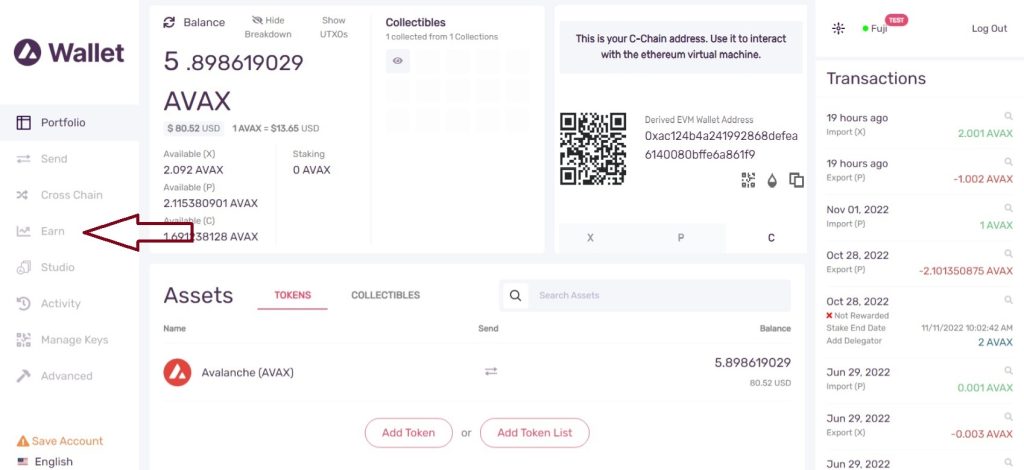
Step 9: Validate on Avalanche Wallet
You can now copy the generated Validator node ID, and go to your Avalanche wallet – wallet.avax.network.
Click on Earn as seen in the picture below.
Step 10: Validate and Paste your Node ID
You can now scroll down and click ADD VALIDATOR which will open the next page.
Here, you can paste the Validator Node ID retrieved in step 8, and paste it.

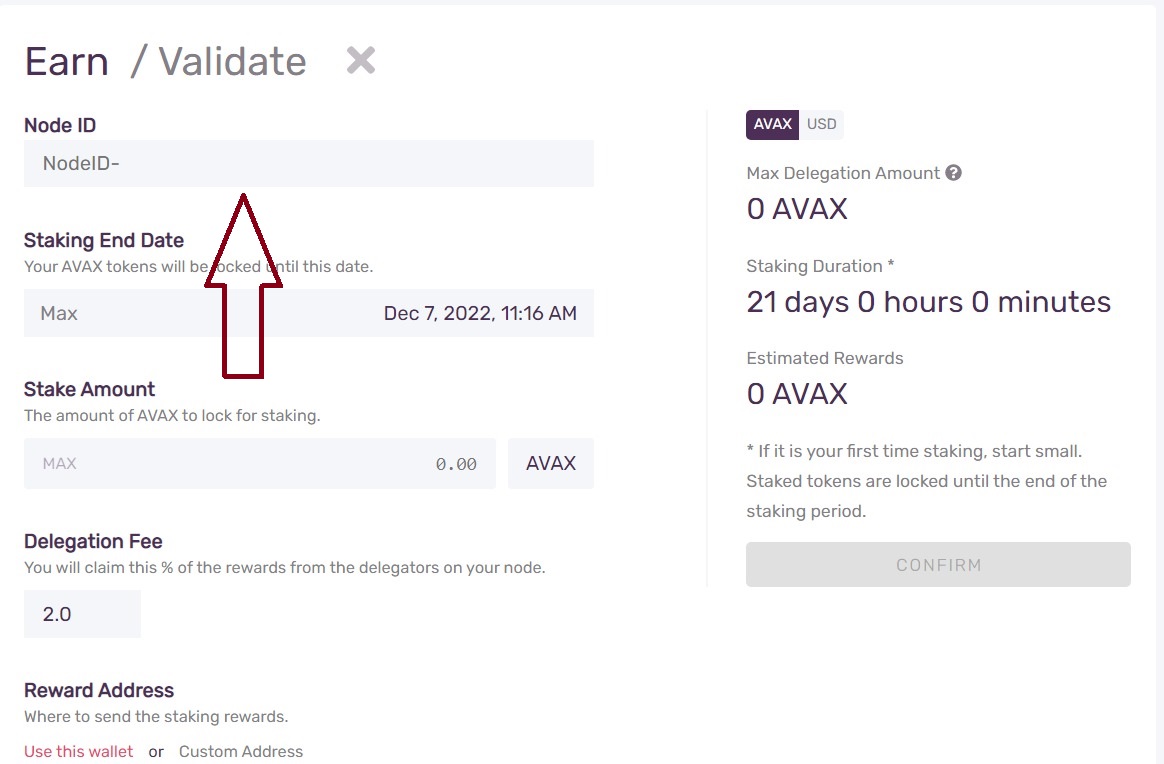
You can now successfully start staking.
The prerequisites to validating your node ID are
- You must have at least 2,000 AVAX on the P chain to become a validator.
- The selected chains must be the P chain ie the Source and the X chain the Destination.
- You can Validate your Node ID, stake your AVAX, and start earning only when these prerequisites are fulfilled.
- If you’re trying to learn how to go about the whole process, and extract some sample AVAX for testing, you can visit faucet.avax.network
Wrapping up
The entire process of staking becomes easier when you already transact AVAX on the Avalanche wallet but it’s never too late to start.
With that said, Zeeve is a leading Blockchain infrastructure platform that not only supports Avalanche but other public protocols like Polygon, Binance, and Polkadot, and permissive protocols like R3Corda and Hyperledger Fabric as well.
Book a free developer consultation today, and make the most of Zeeve’s products & services.