

Not too long ago, the smart contract world used JavaScript predominantly despite the glaring testing and auditing framework drawbacks.
Python, with its reliable and easy-to-navigate syntax, was the obvious replacement choice for most developers, and the name “Brownie” became delectable in more ways than one.
Before learning how to deploy a smart contract, here’s a small introduction to Brownie.
An Introduction to Brownie
In simple terms, Brownie is the Python framework for deploying, testing, and interacting with Ethereum smart contracts.
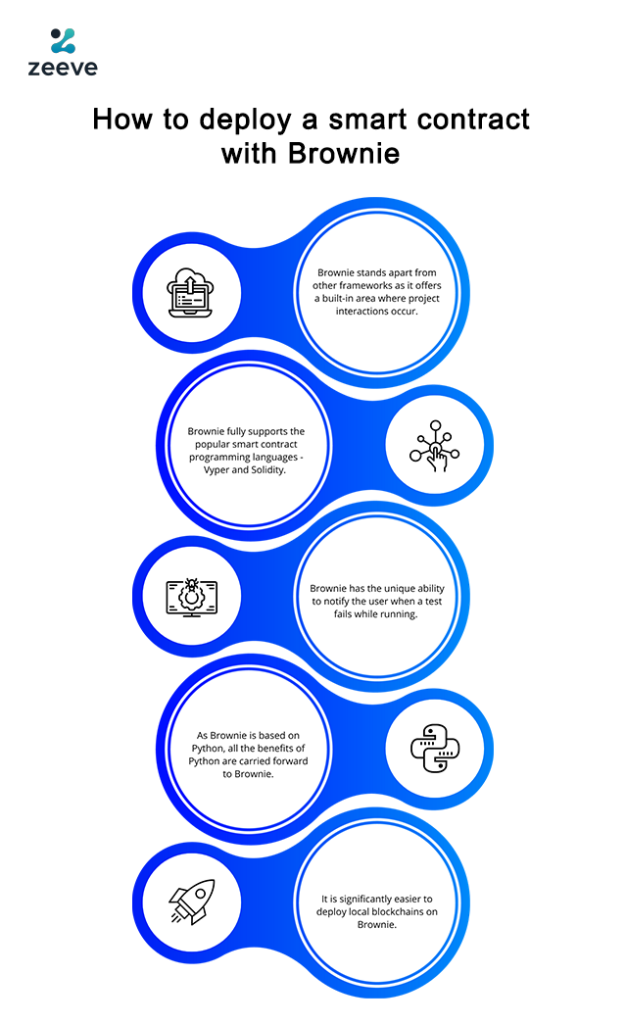
Some of the major advantages of Brownie are
- Brownie stands apart from other frameworks as it offers a built-in area where project interactions occur.
- Brownie fully supports the popular smart contract programming languages – Vyper and Solidity.
- Brownie has the unique ability to notify the user when a test fails while running.
- As Brownie is based on Python, all the benefits of Python are carried forward to Brownie.
- It is significantly easier to deploy local blockchains on Brownie.
Introduction
Now that you have a grasp of Brownie, let us see what else you will learn in this guide.
- How to use Solidity to build a basic Ethereum wallet.
- How to deploy a wallet to Zeeve using Brownie.
- How to send & receive Ether.
- How to deploy a smart contract.
Prerequisites to understanding the guide:
- Fundamentals knowledge of Python and Solidity.
- Building two Metamask accounts on Rinkeby testnet.
- Ensuring the latest versions of Brownie and Solidity are installed.
Preparing Brownie
The first step is installing browning with “pip” or “pipx” so go to your terminal/cmd and type the following:
pip install eth-brownieStep two is creating a new directory and switching “cd” to this directory. The codes for this is:
mkdir project
cd project
Step three is running the command to start a new Brownie project and this will create boilerplate content that will help you carry on the subsequent steps with Brownie:
brownie init
Creating Ethereum Wallet with Solidity
The next step is to create an Ethereum wallet to transact Eth via Solidity, where the addresses of users will be mapped and stored.
For this, you need to create a function that has the ability to receive payments, map addresses, and the Ethereum amount that’s deposited.
This will be followed by withdrawal. Here, we will add a condition in the code to ensure only the account owner can withdraw the Eth, and the person to deploy said contract will be the owner.
Let’s begin:
- Create a Solidity file in the “contracts” folder.
- This contracts folder is created when you ran the command “brownie init”.
- Type in the following code in the file that was just created.
// SPDX-License-Identifier: MIT
pragma solidity 0.8.17;
contract EtherWallet {

    //mapping to store addresses and amount of ETH deposited
    mapping(address => uint256) public addressToAmountReceived;

    // array of addresses who deposited
    address[] public senders;
address public owner; // the first person to deploy the contract is the owner
function received() public payable {
        //add to mapping and senders array
        addressToAmountReceived[msg.sender] += msg.value;
        senders.push(msg.sender);
    }


    modifier onlyOwner {
     //is the message sender owner of the contract?
        require(msg.sender == owner, "Only the owner can call this method!");

        _; // withdraw() function will be inserted here
    }

    // onlyOwner modifer will first check the condition inside it
    // and if true, withdraw function will be executed
    function withdraw(uint _amount) external onlyOwner {
        payable(msg.sender).transfer(_amount);
}
function currentBalance() external view returns (uint) {
        return address(this).balance;
    }
}
Once this is finished, run the below command to compile Solidity:
brownie compile
If you have followed all the steps to the tee, you have created an Ethereum wallet, and let’s test if it works.
Setting up Zeeve
Zeeve is a platform that provides you with the infrastructure to develop blockchain applications easily. In this instance, we will be using it to deploy a new smart contract.
Create a Zeeve account to start with and complete all the signup procedures. Get the free developer plan or any other plan that suits your needs.
Next, name your endpoint, select default workspace, Ethereum protocol, and Rinkeby network.
The interface should look something like this:

Give a custom name for the endpoint, fill in all the other details, and hit next.
Fill in the security details in the next step, submit, generate your project, and copy it. This project ID will help you connect Zeeve to your smart contract.
Writing the Deploy Script
The first step is writing a simple step to deploy your smart contract to Zeeve.
From the various networks that are supported by Brownie, we are choosing Rinkeby (as shown in the image above), and before starting the script, let’s set up environment variables.
Go to the root of the project and create a file with the title “.env” and paste the below text.
Replace 0xde6c2749e7da7b5e22f268c6a93xxxxxxxxxxxxxxxxxxxxxx with a MetaMask private key account for Rinkeby.
Next, replace 6a776acb7a5147xxxxxxxxxxxxxxxx with the Zeeve project key that you just copied.
export PRIVATE_KEY=0xde6c2749e7da7b5e22f268c6a93xxxxxxxxxxxxxxxxxxxx
export WEB3_ZEEVE_PROJECT_ID=6a776acb7a5147xxxxxxxxxxxxxxxxxxx
Now that the variables are added, you need to ensure that Brownie can access them. You can do so by creating a file name brownie-config.yml in the root. You have now created a file.
Type the code below to direct Brownie toward the PRIVATE_KEY.
dotenv: .env
wallets:
  from_key: ${PRIVATE_KEY}
The next step is creating the file deploy.py in scripts/create and add the below code.
from brownie import EtherWallet, config, accounts
def deploy_wallet():
    account = accounts.add(config["wallets"]["from_key"])
    wallet = EtherWallet.deploy({"from":account}, publish_source=True)
    print(f"Contract deployed to {wallet.address}")
def main():
    deploy_wallet()
This code will add the private key created in the .env file to Brownie and deploy & verify the smart contract. So, this code is crucial.
Verify the Smart Contract on Etherscan
The penultimate step is verifying the created smart contract on Etherscan before using said contract.
To do this, visit etherscan.io and quickly create an account. Next, go to etherscan.io/myaccount and find “API Keys” to the bottom left corner and click it.
Click the +Add button and copy the generated key. The interface look something like this:

Now enter the text below the “.env” file which will allow Brownie to verify the smart contract.
Replace the existing “V5RUC7GU4xxxxxxxxxxxx” text in with the API key you just copied and the code should look like this.
export ETHERSCAN_TOKEN=U7V6NRM8XDHDAZ8xxxxxxxxxxxxxxxxxxxAt last, ensure that you’re at the root of the project and get ready to deploy the smart contract by running the command below.
brownie run scripts/deploy.py --networks rinkebyRunning the above code must return a statement similar to the below one:
Waiting for https://api-rinkeby.etherscan.io/api to process contract...
Verification submitted successfully. Waiting for result...
Verification pending...
Verification complete. Result: Pass - Verified
Contract deployed to 0x9fDe7BDe9dCD4d8AA9D0cb386xxxxxxxxxx
Copy the line after the contract deployed to (0x93fdCD49fDe7BDedxxxxxxxxxxxxxx) and go to https://rinkeby.etherscan.io/ to test your new smart contract.
Voila, your new smart contract is created with the help of Brownie.